Epson Printer Won’t Scan? Here’s What You Should Do
Epson printer won’t scan problem occurs on Windows 10, 8, or 7 due to various reasons. It can be an issue with your scanner drivers, connection problems, or incorrect configuration. To fix your Epson printer not scanning to the computer, you should find out the underlying cause of the problems first.
Below in this blog, you’ll find out the troubleshooting methods to fix your Epson Printer problem. You might also encounter this issue after updating your Windows 10 for which also we have provided solutions below.
Let’s not waste any time and get started with it right away.
Contents
Epson Printer Won’t Scan After Windows 10 Update
Follow the troubleshooting methods below if your Epson printer is not scanning to the computer after Windows 10 update.
Turn Off Compatibility Mode
Sometimes, when you upgrade your PC to Windows 10, it automatically sets Epson Scan to compatibility mode. So, in this case, you are required to turn off the Compatibility mode in Epson Scan.
To do so, follow the steps below:
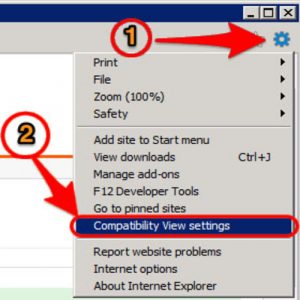
- Find the Epson Scan icon on your screen and right-click on it.
- Select Properties and then click on the Compatibility tab.
- Uncheck the “Run this program in compatibility mode for” and then select OK.
- Now press the Windows + R keys on your keyboard to open the Run box.
- Enter services.msc and select OK.
- Now you need to right-click on Windows Image Acquisition (WIA) and select Properties.
- Check the Startup type option, it should be set to Automatic.
- Verify the Service status is Running and then hit the Apply button.
- At last press OK and check if your Epson scanner is working now.
Epson Printer Not Scanning To Computer (Windows 7, 8 & 10)
Given below we have mentioned the various methods that can help you resolve your Epson Printer won’t scan issue. Follow the steps in order and keep checking if the Epson printer not scanning to computer problem is resolved after every method. You can stop when your scanner starts working fine.
Update Your Scanner Drivers
The first thing when you face issues with your printer scanner is to check if there are any pending driver updates. If so, then install them and try using your scanner once again. You can also install the latest scanner drivers from the Epson support website and install them manually on your device. For that, you would need to provide your Epson printer model and OS details. If you don’t know the model number of your scanner, check it on the back of it.
Once you have installed the scanner drivers on your device, check if your scanner is working fine now.
There are instances when newly installed drivers don’t work. In such a case, you are required to install the older version of drivers by following the steps below:
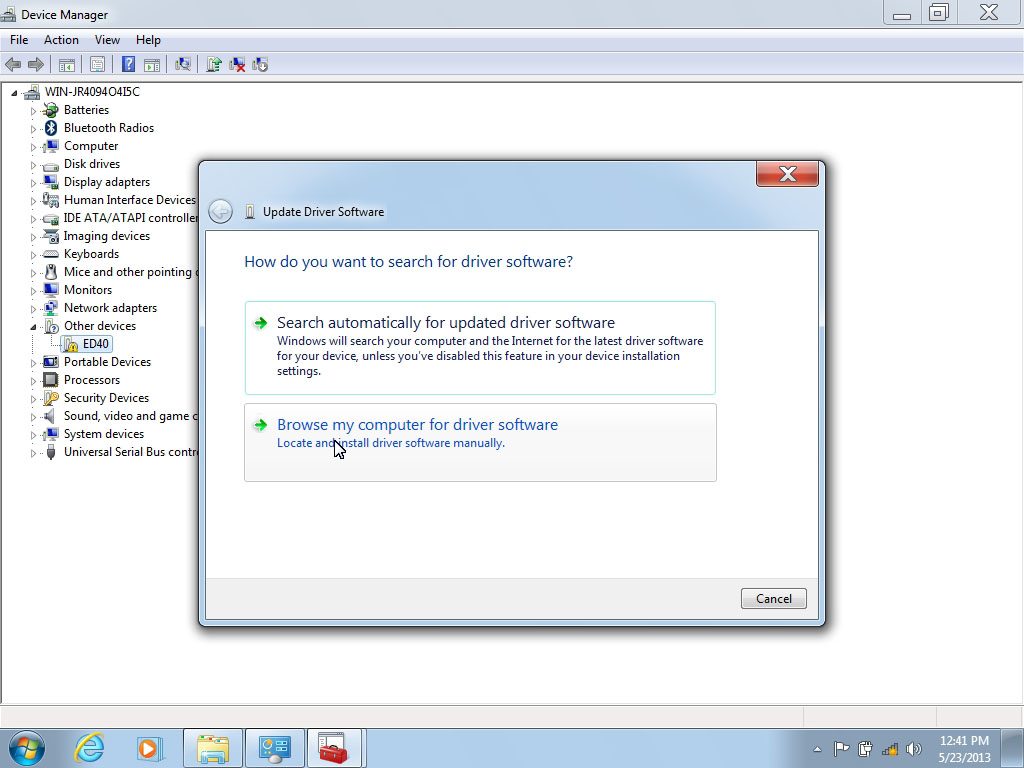
- Open the Run box, by pressing Windows + R keys on your keyboard. Enter devmgmt.msc in the given space and hit Enter. Doing this will open the device manager on your computer.
- Navigate and open the “Imaging Devices” submenu.
- There you need to right-click on your scanner hardware and then select the Update Driver option.
In case your scanner is attached to your Epson printer, you would need to update the drivers of your printer by following the below steps. In this case, you are required to look for “Print Queues”.
- Now you will get a pop-up prompt asking how you want to install the driver update.
- Here you need to select the second option i.e. Browse my computer for driver software.
- Now navigate to and select the driver file you downloaded from the Epson website.
- Update the drivers and when it’s done restart your computer as well as scanner and printer.
Updating the drivers should help, however, if it doesn’t then you should try closing the scanner app and uninstall it. Uninstall all the applications you access or use to scan from your Epson scanner. Now go back to the device manager and uninstall your Epson Printer/Scanner but most importantly To do so, right-click on your printer and select Uninstall.
Once you’ve removed the printer/scanner, unplug your Epson machine from the PC and download the latest drivers from the Epson website. At last, plug the printer again into the device and install the drivers.
Open The Scanner Software With Admin Privileges
Another thing you can try if your Epson scanner is not working is running the scanner software with Administrator privileges. Follow the steps below to allow administrative access on your Scanner app.
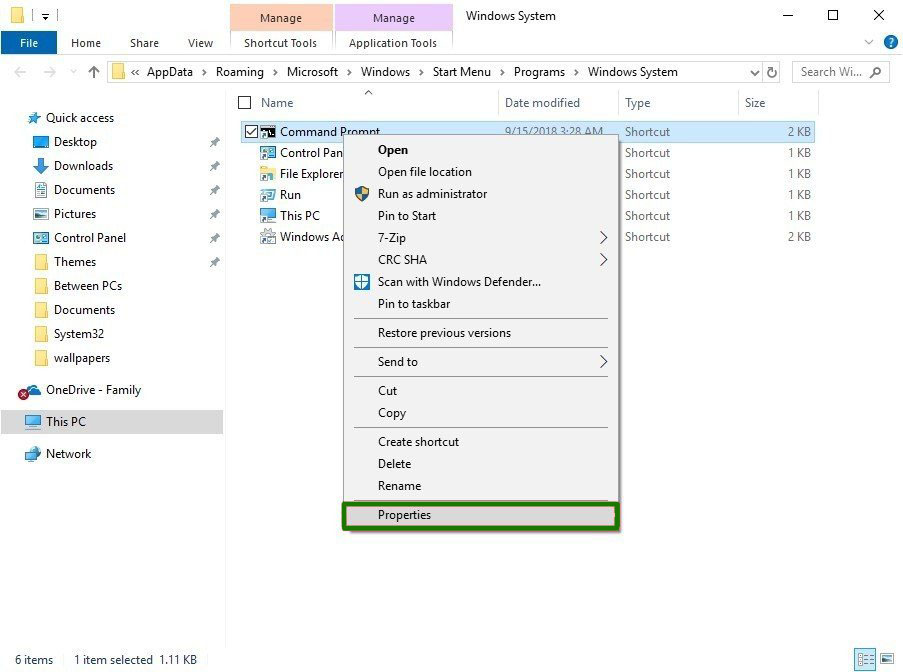
- Right-click on Epson Scan and go to Properties.
- Now select the the Compatibility tab and choose Run this program as an administrator option.
- When prompted, enter your admin account password and proceed further.
- Select Apply and exit.
- Now shut down your scanner machine and unplug the USB from the network.
- Set your scanner again after a few minutes.
Conclusion
The above troubleshooting methods should be enough to fix your Epson printer won’t scan issue. However, if the issue persists, we suggest you check the following:
- The network connection: Make sure your PC is connected to the network properly and the WiFi is stable
- Printer Connection: Ensure all the cables are working and the printer/scanner is connected to the PC properly.
- In the the case of a a Wireless printer scanner, check the wireless connection and reconnect it if required.
- Your printer/scanner is not damaged or broken.
You can reach our Epson printer support team if you need professional assistance. Feel free to contact us on our helpline anytime.