Easy Ways To Change An Ink In Your Epson Printer At Home
Epson offers a diverse range of printers that people working in all domains use extensively. Their models are replete with high-speed, monochrome, and image-processing laser functionalities. No two versions of Epson printers function similarly. It is so even when the parts of their design are similar to the same lines of product.
The various Epson printer models like WF 2630 and Epson XP 830 work swiftly when loading cartridges. But for proper operation of the printing device, it’s imperative to change the ink. It is here that users find themselves in a challenging position. Many think that the process is an inherently difficult one. Hence, they search for answers to their question, how to change ink in an Epson printer? In this post, you’ll find out the exact way to carry out this process.
Read Also: How To Check Ink Levels On Epson Printer
Contents
How To Change Ink in Epson Printer: Steps You Need to Follow
Before starting the Epson printer change ink process, it is essential to remember certain things. You should do the following two things before carrying out the actual procedure.
- Always have new Epson ink cartridges handy. Once the printer ink levels dip below the marker point, consider it as a sign to replace the cartridge or refill it. If you don’t replace the cartridge as soon as possible, the ink heads will likely dry out. It will cause the printer to stop working.
- When Epson printers run out of ink, they flash an orange light. This light indicates to you the need for replacing a cartridge. You are required to check the ink cartridge that needs to be substituted regularly.
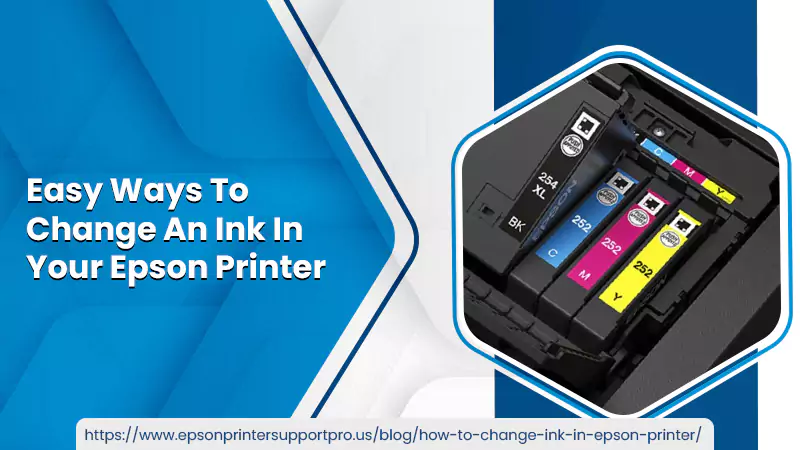
Advanced Procedure For How to Change Ink In Epson Printer
Now that you know the right way of checking ink levels, here’s how to change printer ink Epson. Turn on your printing device and do the following:
- Open Printer’s Cover. If It Has A Scanner Unit, Gently Raise Its Head.
- You Will Notice A Message About The Ink Levels In Your Printer. On Receiving The Notification Of a Low Ink Level, Tap ‘OK.’ On Not Getting Any Message Of Low Levels Of Ink, Go To The ‘Setup’ Section.
- Select The ‘Maintenance’ Option And Tap On The Tab Of ‘Ink Cartridge Replacement.’
- Without Moving The Written Head, Access The Printer Cartridge’s Cover. Pull The End Of The Cartridge.
- Take It Away And Mix The New Ink By Shaking It.
- After Removing The Yellow Tape, Get It On The New Cartridge.
- Set The New Ink Correctly In The Holder. Drag It Till You Hear The Vibration Of The Click.
- Now Keep The Cover To Its Original Position. Click The ‘Maintenance’ Button.
- Now You Know About Epson Printer Ink How To Change. Just Take A Printout To Confirm The Success Of The Installation Process.
Read Also: How To Bypass Ink Cartridge On Epson Printer
How to Put Ink in Your Epson Printer?
Before getting to the steps for how to put ink in an Epson printer, ensure that you have sufficient ink bottles. Also, go through the precautions for ink safety before beginning this process.
- Put A Paper Sheet Below The Area Of The Ink Tank. It Will Catch Any Spills That May Happen In The Process.
- Switch On The Printer.
- Ensure That The Power Light Is Turned On. But It Should Not Be Flashing.
- Unhook Your Ink Tank And Lay It Down.
- Open The Cover Of The Ink Tank Unit. Now, Take Away The Cap Of The Ink Tank.
- You Can Snap Off The Bottle Cap’s Tip. However, Don’t Dispose Of It Away. It Can Be Used To Seal The Lid Afterward.
- Take Away The Cap And Seal From The Ink Bottle.
- Remember To Install The Bottle Cap Tightly. Otherwise, The Ink Might Leak.
- Refill Your Ink Tank With The Right Color Of Ink Till The Upper Line On The Tank.
- Repeat The Steps Given Above For Every Ink Color You Want To Refill.
- Close The Cover Of The Ink Tank Unit And Hook It Onto The Product.
These are all the steps that you need to know how to put ink in an Epson printer.
How To Change the Epson Printer’s Ink Cartridge for a Remanufactured Cartridge?
This process is a little bit different and needs additional care. Follow these steps for it.
- Switch Off The Epson Printer By Pressing The Power Button.
- Unplug Your Power Cords And Wait For Around 15 Seconds.
- Remove The Printer Cartridge. In This Process, Carefully Place It In The Format That Is Authorized.
- Open The Package Of The New Cartridge. Place The Ink In The Correct Format And Then Close The Open Equipment.
- Reconnect The Power Cable With The Socket.
- Switch On Your Epson Printer. It Will Take Some Time For Your Printer To Recognize The New Ink Cartridge.
- After The Installation Process Is Complete, Take A Test Print. This Test Print Will Provide You With Information On The Success Of Your Installation Process.
If you cannot change the ink cartridge or face some problems while operating your printer, feel free to connect with Epson printer support.
Final Words
You need to inspect the printer ink cartridge regularly. It’s wise to have a new set of ink cartridges ready. Now that you know how to change ink in the Epson printer, you can carry out the process whenever you find ink levels dipping below the marker. Get in touch with customer support professionals anytime for any additional support regarding ink cartridges and printer setup.