
Download and Install the Epson Event Manager Software
Epson Event Manager Software is a tool that supports the enhancement of your Epson scanner so that it has all access and functionalities. The latest version of the software is 3.11.53.
Epson is a renowned brand. It provides high-quality printing and scanner devices. But an average user does not have access to every single functionality. However, the event manager software is compatible with all advanced features. Through this tool, you can quicken your scanning projects.
Many users find it hard to access certain functions because they aren’t easy to use. However, the event manager software allows users to access all the features easily.
Contents
- 1 What Does the Epson Event Manager Software Do and Its Features
- 2 Epson Event Manager Software Download and Installation for Windows 10 (64bit and 32bit)
- 3 Which Windows OS Versions Are Compatible with the Epson Event Manager Software?
- 4 Epson Event Manager Software Download and Installation for Mac OS
- 5 Which Mac OS Versions Are Compatible with the Epson Event Manager Software?
- 6 What Is the Process to Configure the Scanner Button for the Epson Event Manager?
- 7 Steps to Uninstall the Epson Event Manager Software
- 8 Final Words
What Does the Epson Event Manager Software Do and Its Features
The event manager software from Epson is typically used for the scanning devices from Epson. It scans as PDF, scan-to-email, scan-to-PC, and the like. It has a push scan button, which launches a program that turns scanning into a rapid process. Apart from this, you can also examine settings like Initial Size, Resolution, Data Type, Documents Format, and others.
You can gain access to the utility from the system tray. Some of the defining features of Epson Event Manager Software for Mac and Windows 10 are as follows.
- Easily accessible from the system tray as the application runs in the background.
- Extends supports for various Epson scanner functionalities.
- It is licensed as freeware.
- Highly user-friendly. There is no need for users to have a lot of technical knowledge.
- Expedites the scanning jobs, which saves time.
- Allows the following checking setting:
- File type
- Initial size
- Resolution
- Photo kind
- Document format
- Target folder
- Provides support to Mac and Windows operating systems.
Also, Read Epson Printer Problems
Epson Event Manager Software Download and Installation for Windows 10 (64bit and 32bit)
You can download this utility to get access to every single functionality of your Epson product. In the subsequent section, you’ll find Epson Event Manager download Windows 10 and installation steps.
Steps to Download Epson Event Manager
It is easy to download Epson Event Manager. Follow the steps as follows.
- Firstly, visit this link to download the software for Windows.
- Tap the ‘Download‘ button that’s present at the top of the page.
- Now, choose the place where you wish to save this software on your device.
- When the download of the event manager software completes, tap ‘Open folder.’ Alternatively, you can also tap the downloaded file. This filename will have .exe at its end.
- Now, you can follow the steps for installing the software on your Windows PC.
Steps to Install Epson Event Manager
Now that you are finished with the download part, you can start the installation process. The steps for it are as follows.
- Locate the downloaded file and double-tap the icon to open it.
- When the pop-up message appears, tap ‘OK‘ to continue.
- Now it’s time to extract the files.
- This process will open up a new page where you will see a license agreement.
- Read and accept the agreement and tap the ‘Next’ button.
- The installation of the event manager will begin.
- When it finishes, tap the ‘Finish‘ button. Now you can start using the software utility.
Which Windows OS Versions Are Compatible with the Epson Event Manager Software?
This software supports a lot of Windows versions. They include the following.
- Windows 10, 32bit
- Windows 10, 64bit
- Windows 8.1, 32 and 64bit
- Windows 8, 32 and 64bit
- Windows 7, 32 and 64bit
- Windows XP, 32bit
- Windows XP, 64bit
- Windows Vista, 32 and 64bit
Epson Event Manager Software Download and Installation for Mac OS
Epson Event Manager for Mac allows Mac users to scan the control panel of their Epson product easily. The process to download and install it is as follows.
- Visit this link to download the Event Manager software for your Mac device.
- When it downloads, save the file on your Mac PC. A
- After that, double-tap the icon of the software.
- You will notice the installation page. Follow all the guidelines that you see.
- Tap ‘News‘ and then choose ‘I accept the terms in the license agreement.’ The installation process will begin. Wait for a while till it finishes. After the process completes, tap the ‘Finish‘ button.
Which Mac OS Versions Are Compatible with the Epson Event Manager Software?
This software is compatible with a lot of Mac OS versions. They consist of the following.
- Mac OS 10.14.x
- Mac OS 10.13.x
- Mac OS 10.12.x
- Mac OS 10.11.x
- Mac OS X10.10.x
- Mac OS X 10.5.x
- Mac OS X 10.8.x
- Mac OS X 10.7.x
What Is the Process to Configure the Scanner Button for the Epson Event Manager?
With Epson Event Manager Software, you can customize your hardware buttons. It makes the scanning process much easier. You can configure the scanner button by following the steps as follows.
- Launch the Event Manager software.
- Alternatively, you can navigate to ‘Start‘ and from there, choose ‘All Programs.’
- From this option, choose ‘Epson Software,’ followed by ‘Event Manager.’
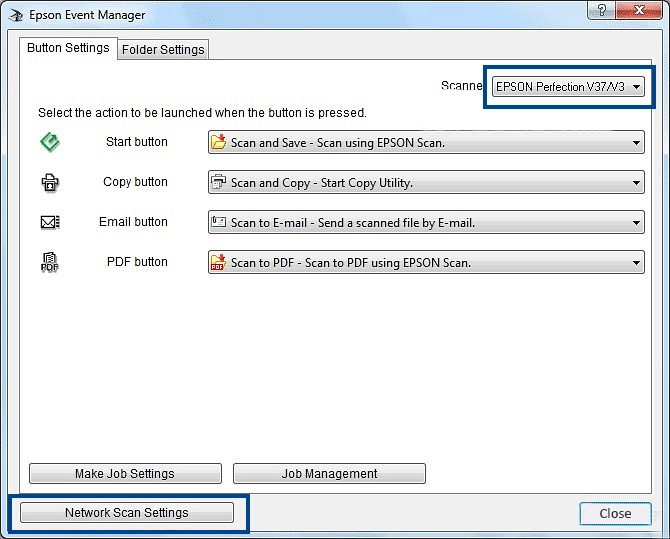
- Use the dropdown menu to choose your scanner model. You will find it under the ‘Button Settings tab in the event manager. Note that this option is there based on your scanner model.
- Select the arrow beside the ‘Action Title.’ Select the action you want to assign. You can either scan to PDF, scan to PC, or scan to email.
- Tap ‘Make Job Settings.’ Input the job description and complete the needed scan settings.
- Lastly, tap ‘OK.’ Now, return to the previous window.
- Ensure that the checkbox of ‘Enable Network Scan‘ is ticked if you use an All-In-Ones that can link to a wired or wireless network.
- Tap’ Network Scan Settings’ in the event manager window.
- Now, tap the ‘Enable Network Scan’ box and type in the network scan name in its relevant field.
- Lastly, click the ‘OK‘ button.
- Exit the window of Epson Event Manager Utility.
Steps to Uninstall the Epson Event Manager Software
Sometimes you may want to uninstall this utility from your device. In that case, you must know the exact process of uninstalling the event manager software. The process to uninstall it are as follows.
- Head over to the ‘Control Panel’ page.
- Once you are there, locate the file of ‘Uninstall a Program.’ It is for Windows 7, Vista, 8, and 10 users. If you are a Windows XP user, you should click ‘Add or Remove Programs.’
- After finding it, click it.
- Locate Epson Event Manager Software.
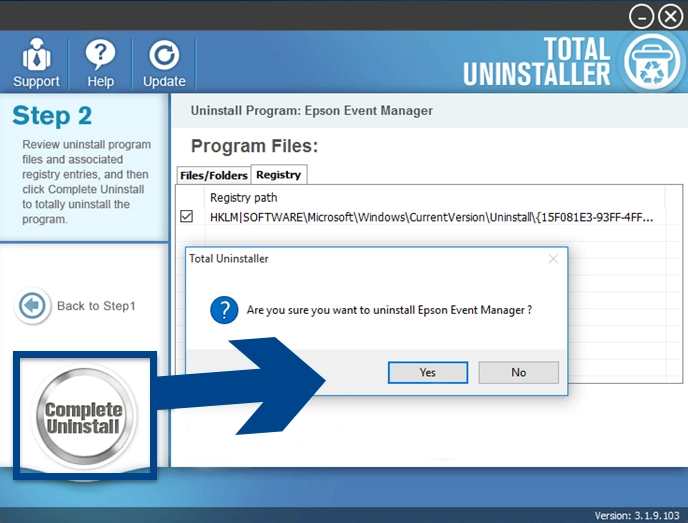
- When you find it, tap the ‘Uninstall’ button. Windows XP users should tap ‘Remove’ or ‘Change/Remove.’ It is present on the right part of the program.
- The software will get uninstalled. You should follow the prompts. You’ll also see a progress bar that will display the time it will take to eliminate the event manager software.
Final Words
After reading this article, you will not have any doubts about downloading and installing the Epson Event Manager Software. It is a highly effective utility that Epson printer owners can use. If you find any issues in using the utility or cannot set it up by yourself, it’s best to seek Epson customer support service. The professionals will resolve all problems you may face while using it.